Editing
Editing in Your Vector Design App
Setting Up the Document
At this stage, the app is set up to accept SVGs created as follows: In your favorite design app, set the document units to millimeters and the document resolution to 96 ppi or dpi, depending on your software.
Layer your design from the base up (or back to front 😅 you know what I mean), just as you’d assemble it physically, stacking each layer on top of the previous one.
Design Guidelines
- Shapes should be closed paths for now—an open shape may not extrude correctly.
- I recommend that each layer consist of a set of curves rather than groups, complex compositions, or masked objects (we’ll get there eventually 😜).
- Texts should be outlined and unified. You can do this using boolean tools or any “merge paths” option your software offers.
- Be cautious when creating graphics with overly complex geometry. This often happens with boolean operations, working with maps, or vectorizing images. Aside from creating unnecessarily large files in your design software, it can cause performance or memory issues when viewing them in 3D in the browser. Try to clean up redundant points that don’t add value to the design.
Layer Naming for Recognition
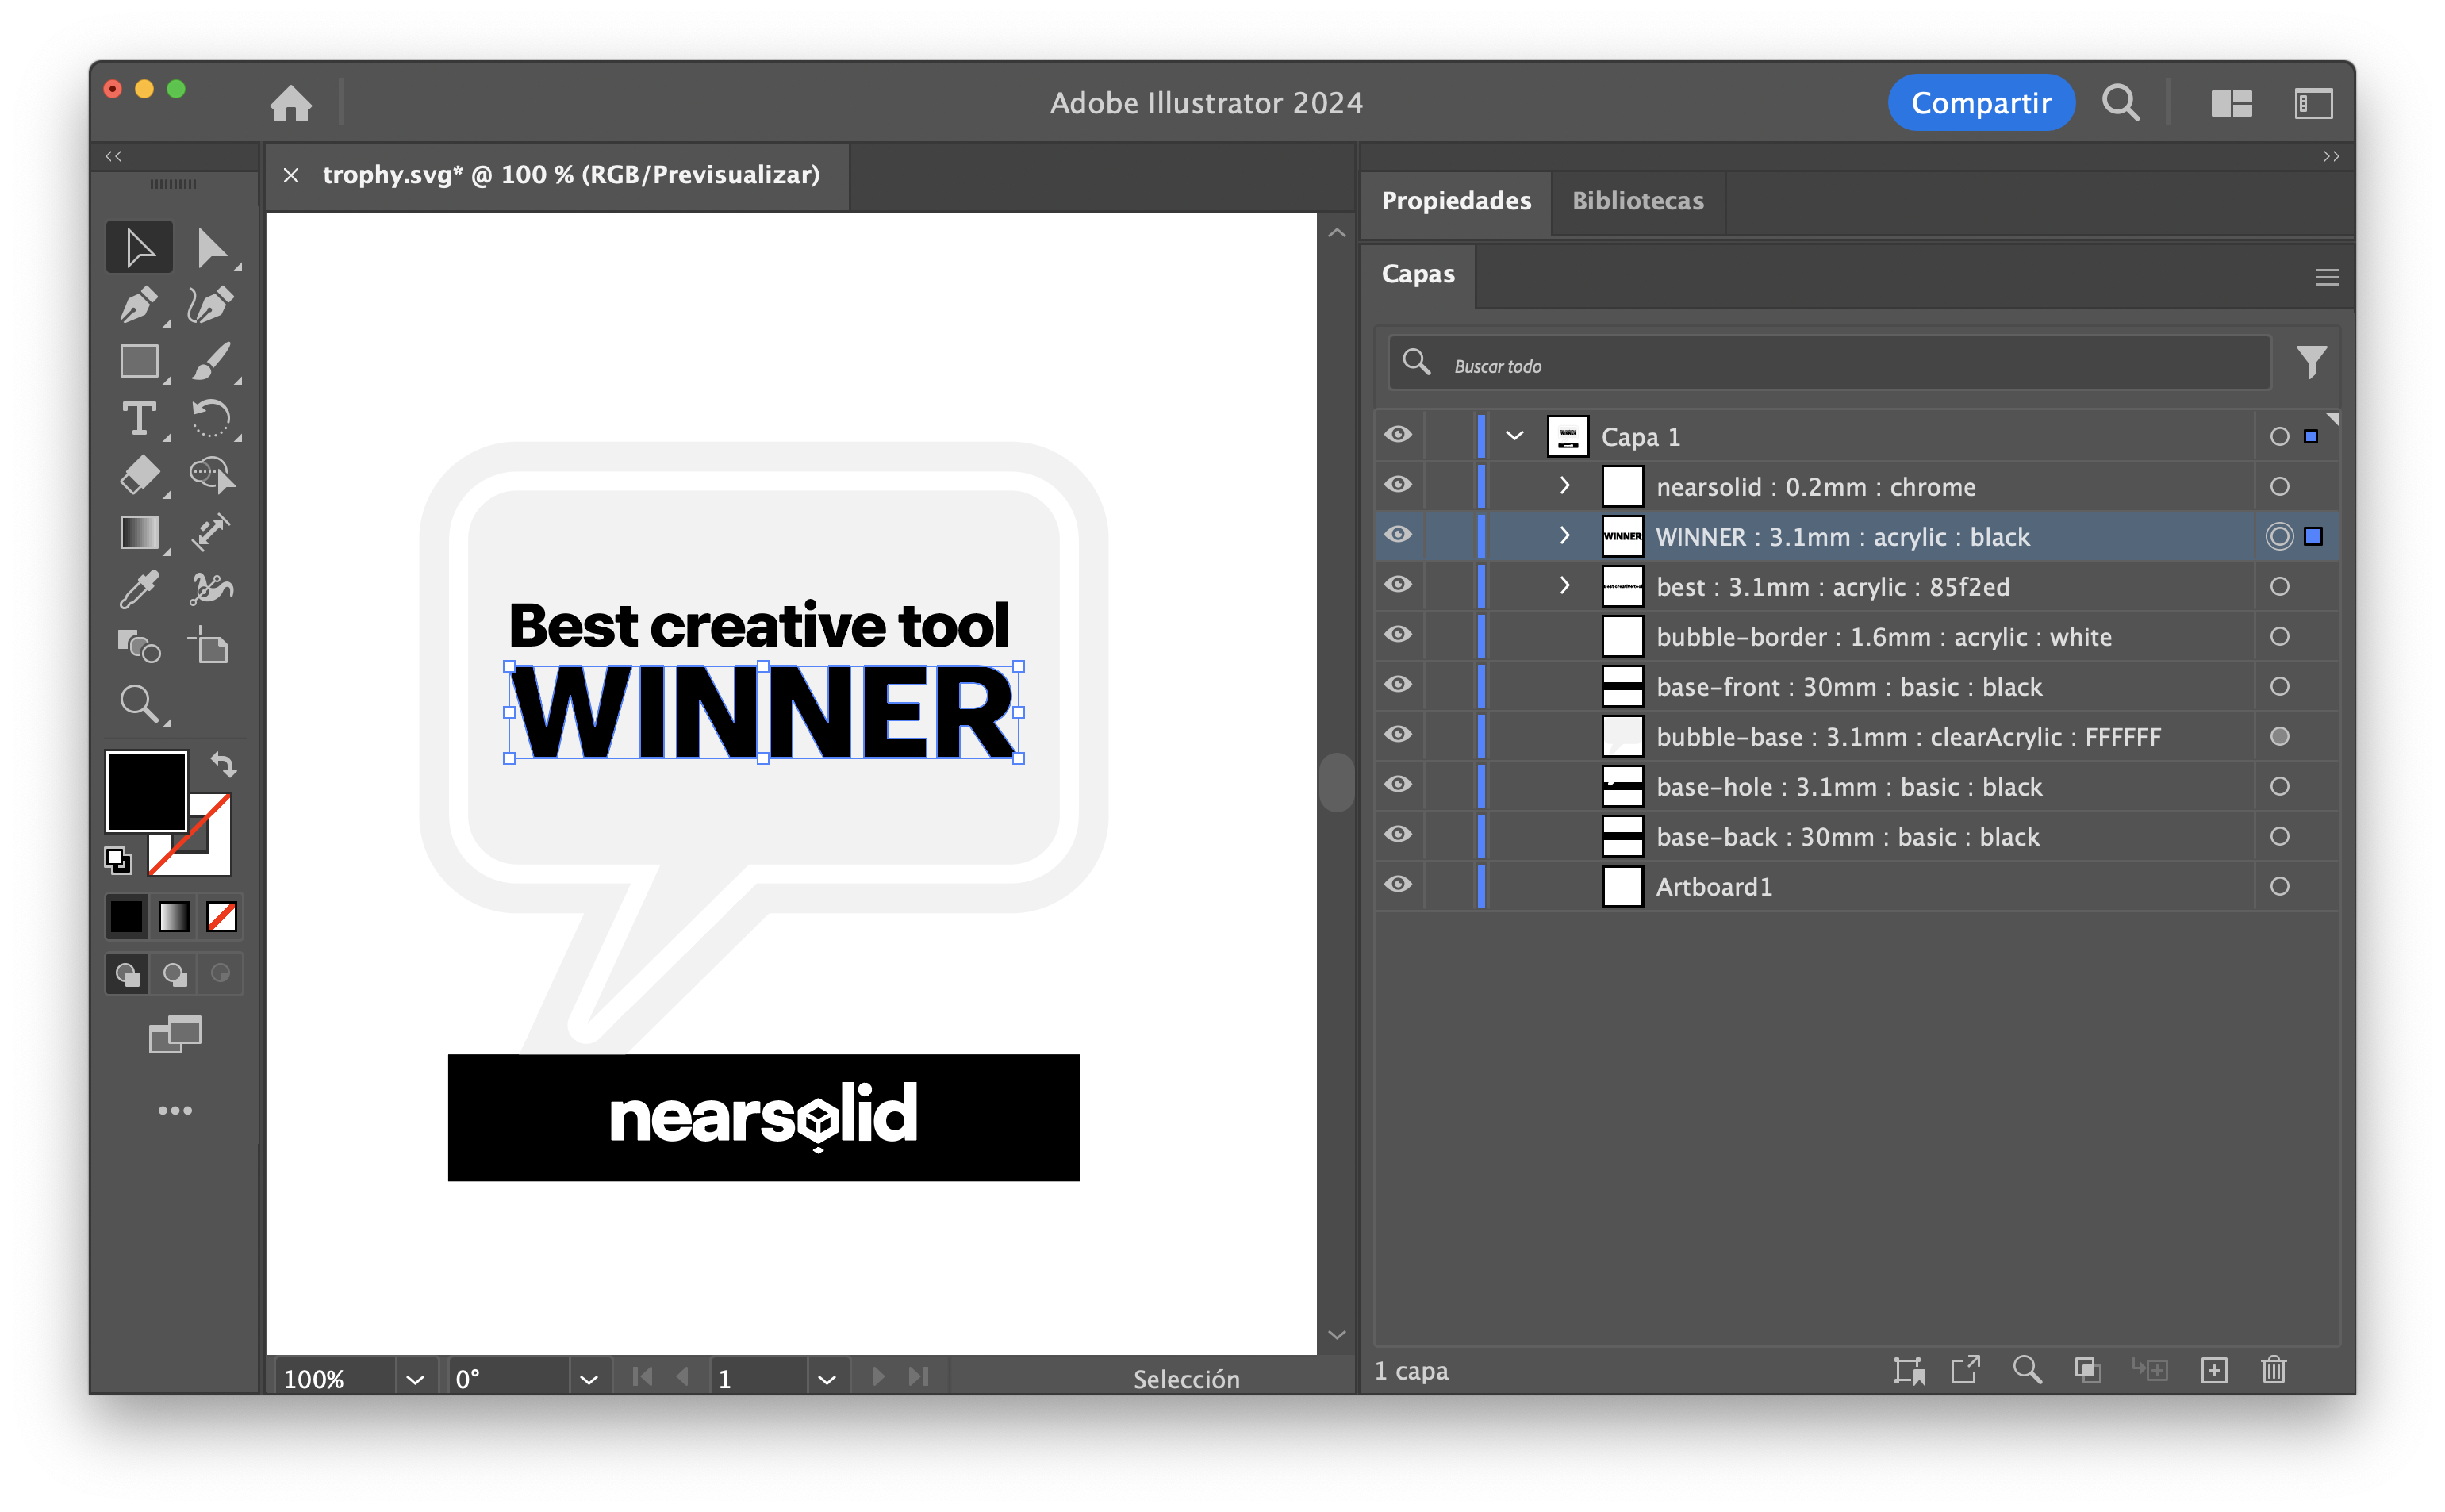 Illustrator document layers for NearSolid
Each layer should follow this pattern so the app can recognize it:
Separate each section with a colon “:”
unique-name : thickness : material : color
Example:
unique-name
Each layer needs a unique name to allow the app to link it correctly, or to detect new layers if you reload the design. Even if layers are identical, they need different names. Any name is fine as long as it doesn’t contain a colon “:”, as this is used as a field separator.
Note: Some programs may have the layer name panel hidden or in a different layout
thickness:
You can use millimeters or inches; internally, all units convert to millimeters. For example: 0.5mm or 0.12 inch.
material:
Right now, the list is short, but I’ll be adding more materials over time. Currently available materials are:
| Material | Description | Color Support |
|---|---|---|
wood | Light plywood appearance | No |
mdf | MDF Light brown | No |
cork | Corck Light brown | No |
acrylic | Opaque material | Yes |
clearAcrylic | Transparent acrylic material | Yes |
translucentAcrylic | Translucent material | Yes |
frostedAcrylic | Translucent with frosted effect | Yes |
vinyl | Vinyl finish effect | Yes |
glass | Can be used for transparent acrylic | Yes |
basic | Matte paint finish | Yes |
spray | Effect texture paint | Yes |
leather | Similar to leatherette | Yes |
foam | EVA foam material | Yes |
engrave | Special mode to simulate engrave * | Yes |
mirror | Mirror finish | No |
gold | Gold finish | No |
silver | Silver finish | No |
chrome | Chrome finish | No |
image | Special mode to show bitmaps * | No |
lightbox | Shiny translucent material | Yes |
color:
You can use various formats for the color field:
- HTML color names in English, like
red,cyan,orange, etc. - Full list here.
- Hexadecimal values:
ff0000,#008B8B,0x00ffff.
Download: Sample materials SVG

New in the latest version
- When you don’t specify a material (for example,
frame : 3mm), NearSolid treats it as the basic material and looks for a color in the vector shape — fill first, then stroke. - If you specify a tintable material but don’t provide a color (for example,
frame : 3mm : eva), it assigns the EVA material and then looks for a color in the shape — fill first, then stroke. - If the layer description is applied to a group, NearSolid uses the first element it finds in that group as the reference.