Interface Overview
When you log in with your username and password, you'll see the scene featured in many of NearSolid's videos.
NearSolid Interface Overview
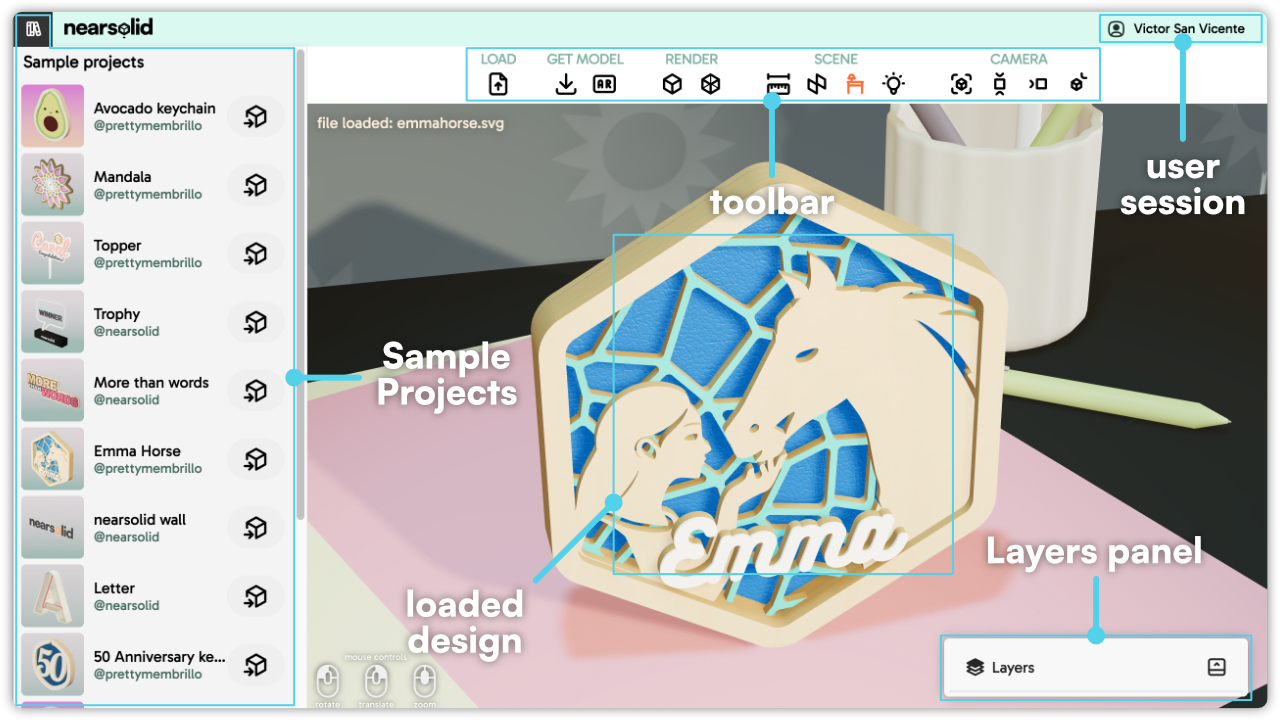
NearSolid's interface is designed to be intuitive and efficient, allowing creators to easily import, visualize, and adjust their 3D models. The main sections of the interface include:
1. Sample Projects
On the left side, you'll find a panel with sample projects. These preloaded designs help you quickly explore the tool’s capabilities or serve as a starting point for your own projects.
At the top-left corner, there's a button that allows you to show or hide the sample models for a cleaner workspace.
2. Main Toolbar
At the top, the toolbar provides access to NearSolid’s key features, divided into the following categories:
- Load: Import an SVG file to convert it into a 3D model. You can also drag and drop your SVG file directly into the NearSolid workspace.
- Get Model: Export your design in different formats such as GLTF, USDZ, or optimized SVG.
- Render: Adjust visualization settings like flat shading and wireframe view.
- Scene: Toggle rulers, exploded views, and lighting settings.
- Camera: Quickly switch between predefined camera angles.
3. Loaded Design View
The center of the interface displays your loaded 3D design. Here, you can inspect and manipulate your model with zoom, rotation, and translation controls.
4. Layers Panel
Located at the bottom right, this panel provides access to individual layers in your design. You can toggle visibility and make adjustments to different parts of your model.
5. User Session
On the top-right corner, you can find the user session area, displaying the logged-in user’s name and profile settings.
Video Walkthrough
Here’s a quick video to show you how it works