Configuring Your Design for NearSolid
 Affinity Designer document layers for NearSolid
To ensure the best experience when importing your designs into NearSolid, it's important to set up your document correctly in your preferred design software. Below, you'll find detailed steps for different applications.
General Recommendations
- Use physical units: Set your document to millimeters (mm) or inches.
- Resolution: Use 96 PPI for accurate scaling.
- Layers & Colors: Properly organize your layers to facilitate material assignment in NearSolid.
- Export to SVG: Make sure to export the SVG as editable, meaning it should retain vector information and not be saved as a bitmap image!
Software-Specific Setup
Adobe Illustrator
Inkscape
Affinity Designer
LightBurn
CorelDRAW
Adobe Illustrator
- Open Illustrator and create a New Document.
- Set the Units to millimeters or inches.
- Set the Raster Effects to 96 PPI.
- Organize your layers based on material types.
- Export: Use
File > Export > Export As...and select SVG. - In the SVG options, use SVG 1.1, set Decimal Places to 3, and check Preserve Illustrator Editing Capabilities if needed.
Inkscape
- Open Inkscape and create a New Document.
- Go to
File > Document Propertiesand:- Set Display Units to mm or inches.
- Set Custom Size if necessary.
- Ensure the Scale Factor is 1 (96 DPI).
- Organize layers properly for easier material assignment.
- Export: Use
File > Save Asand select Plain SVG. (Inkscape's default SVG format is also supported, but we recommend saving as Plain SVG for a more compact file.)
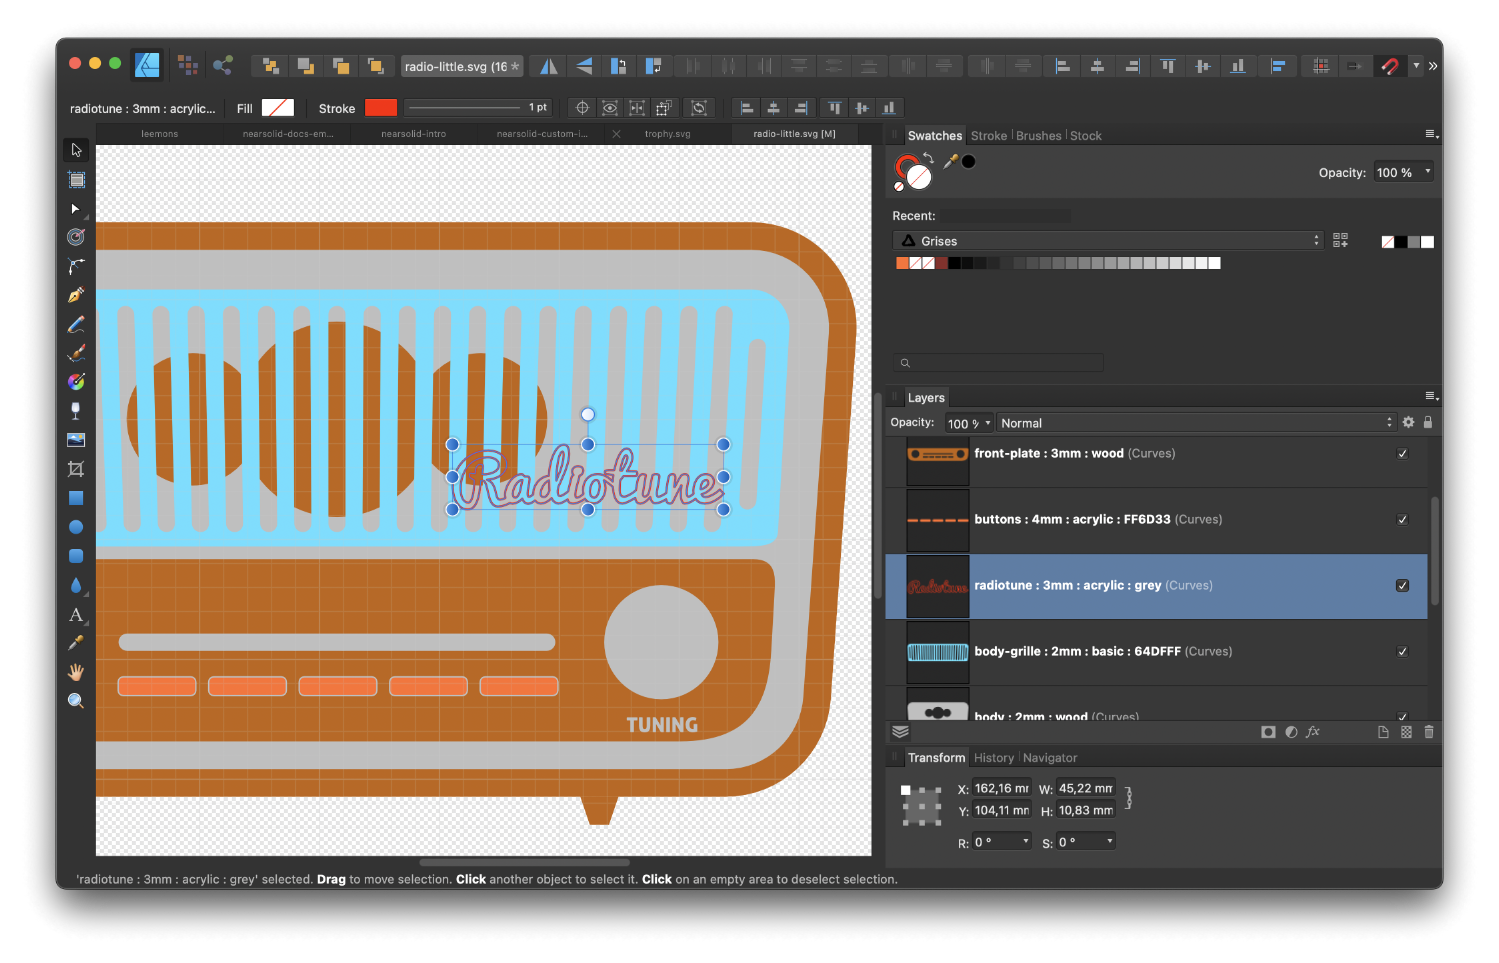
Affinity Designer
- Open Affinity Designer and create a New Document.
- Set Units to mm or inches.
- Under
File > Document Setup, ensure 96 DPI is selected. - Organize layers based on different materials.
- Export: Use
File > Export, choose SVG, and ensure the following settings:- Use document resolution: Enabled (if the document is already set to 96 DPI)
- Rasterize: Nothing
- Use Relative Coordinates: Enabled
- Use hex colors: Enabled
- Flatten Transforms: Enabled
- Set viewBox: Enabled
- Export text as curves: Enabled
CorelDRAW
- Open CorelDRAW and create a New Document.
- Set Units to millimeters or inches.
- Go to
Tools > Options > Documentand ensure 96 DPI is selected. - Organize your layers by materials and colors to simplify identification in NearSolid.
- Export: Use
File > Export, choose SVG, and ensure the following settings:- Export text as curves: Enabled
- Maintain layer structure: Enabled
- Preserve appearance: Enabled
- SVG version: 1.1 or later
By following these steps, you can ensure your designs import correctly into NearSolid for a smooth workflow. 🚀
LightBurn
LightBurn handles SVG export differently from other programs. There are some limitations to be aware of:
-
No Layer Names: LightBurn does not support named layers in exported SVGs, so NearSolid cannot automatically assign materials based on names.
-
Default Layer Thickness: NearSolid will create layers with a default thickness of 3mm, using a basic material matching the layer color.
-
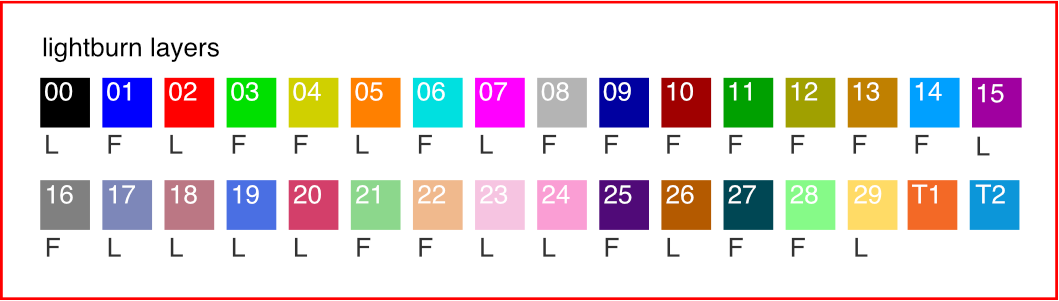
Layer Order Handling: LightBurn does not preserve the exact layer order from your workspace:
- It first exports engraving layers (F), followed by cutting layers (L).
- The layers are ordered based on their palette color rather than their arrangement in LightBurn.
-
Example: If two shapes exist, one colored
#000000(black 00) and another#FF0000(red 02), LightBurn will always place the black layer below the red one, regardless of how they are arranged in the document. -
Current Limitation: NearSolid does not yet support manual reordering of layers after import.
To export an SVG in LightBurn:
- Go to
File > Export SVG. - Select Flatten Polylines if necessary.
- Save the file and import it into NearSolid.